How to set up iOS remote config
Feb 11, 2025

Remote config enables you to update your iOS app's settings and behavior instantly without deploying new code or waiting for App Store approval. This helps you control features access on the fly and disable them instantly if needed.
This tutorial shows you how to set up remote config in your iOS app using PostHog. We'll create a basic iOS app using SwiftUI that displays a message controlled by remote config.
1. Creating a new iOS project
First, open Xcode and create a new project:
- Select File > New > Project
- Choose iOS as the platform and App as the template
- Name your project (e.g.,
PostHogRemoteConfig) - Select SwiftUI as the interface
- Leave the other settings as default and click Next
- Choose a location to save your project and click Create
2. Setting up PostHog
Next, we'll add PostHog’s iOS SDK as a dependency. You can use either Swift Package Manager or CocoaPods. We'll use Swift Package Manager for this tutorial:
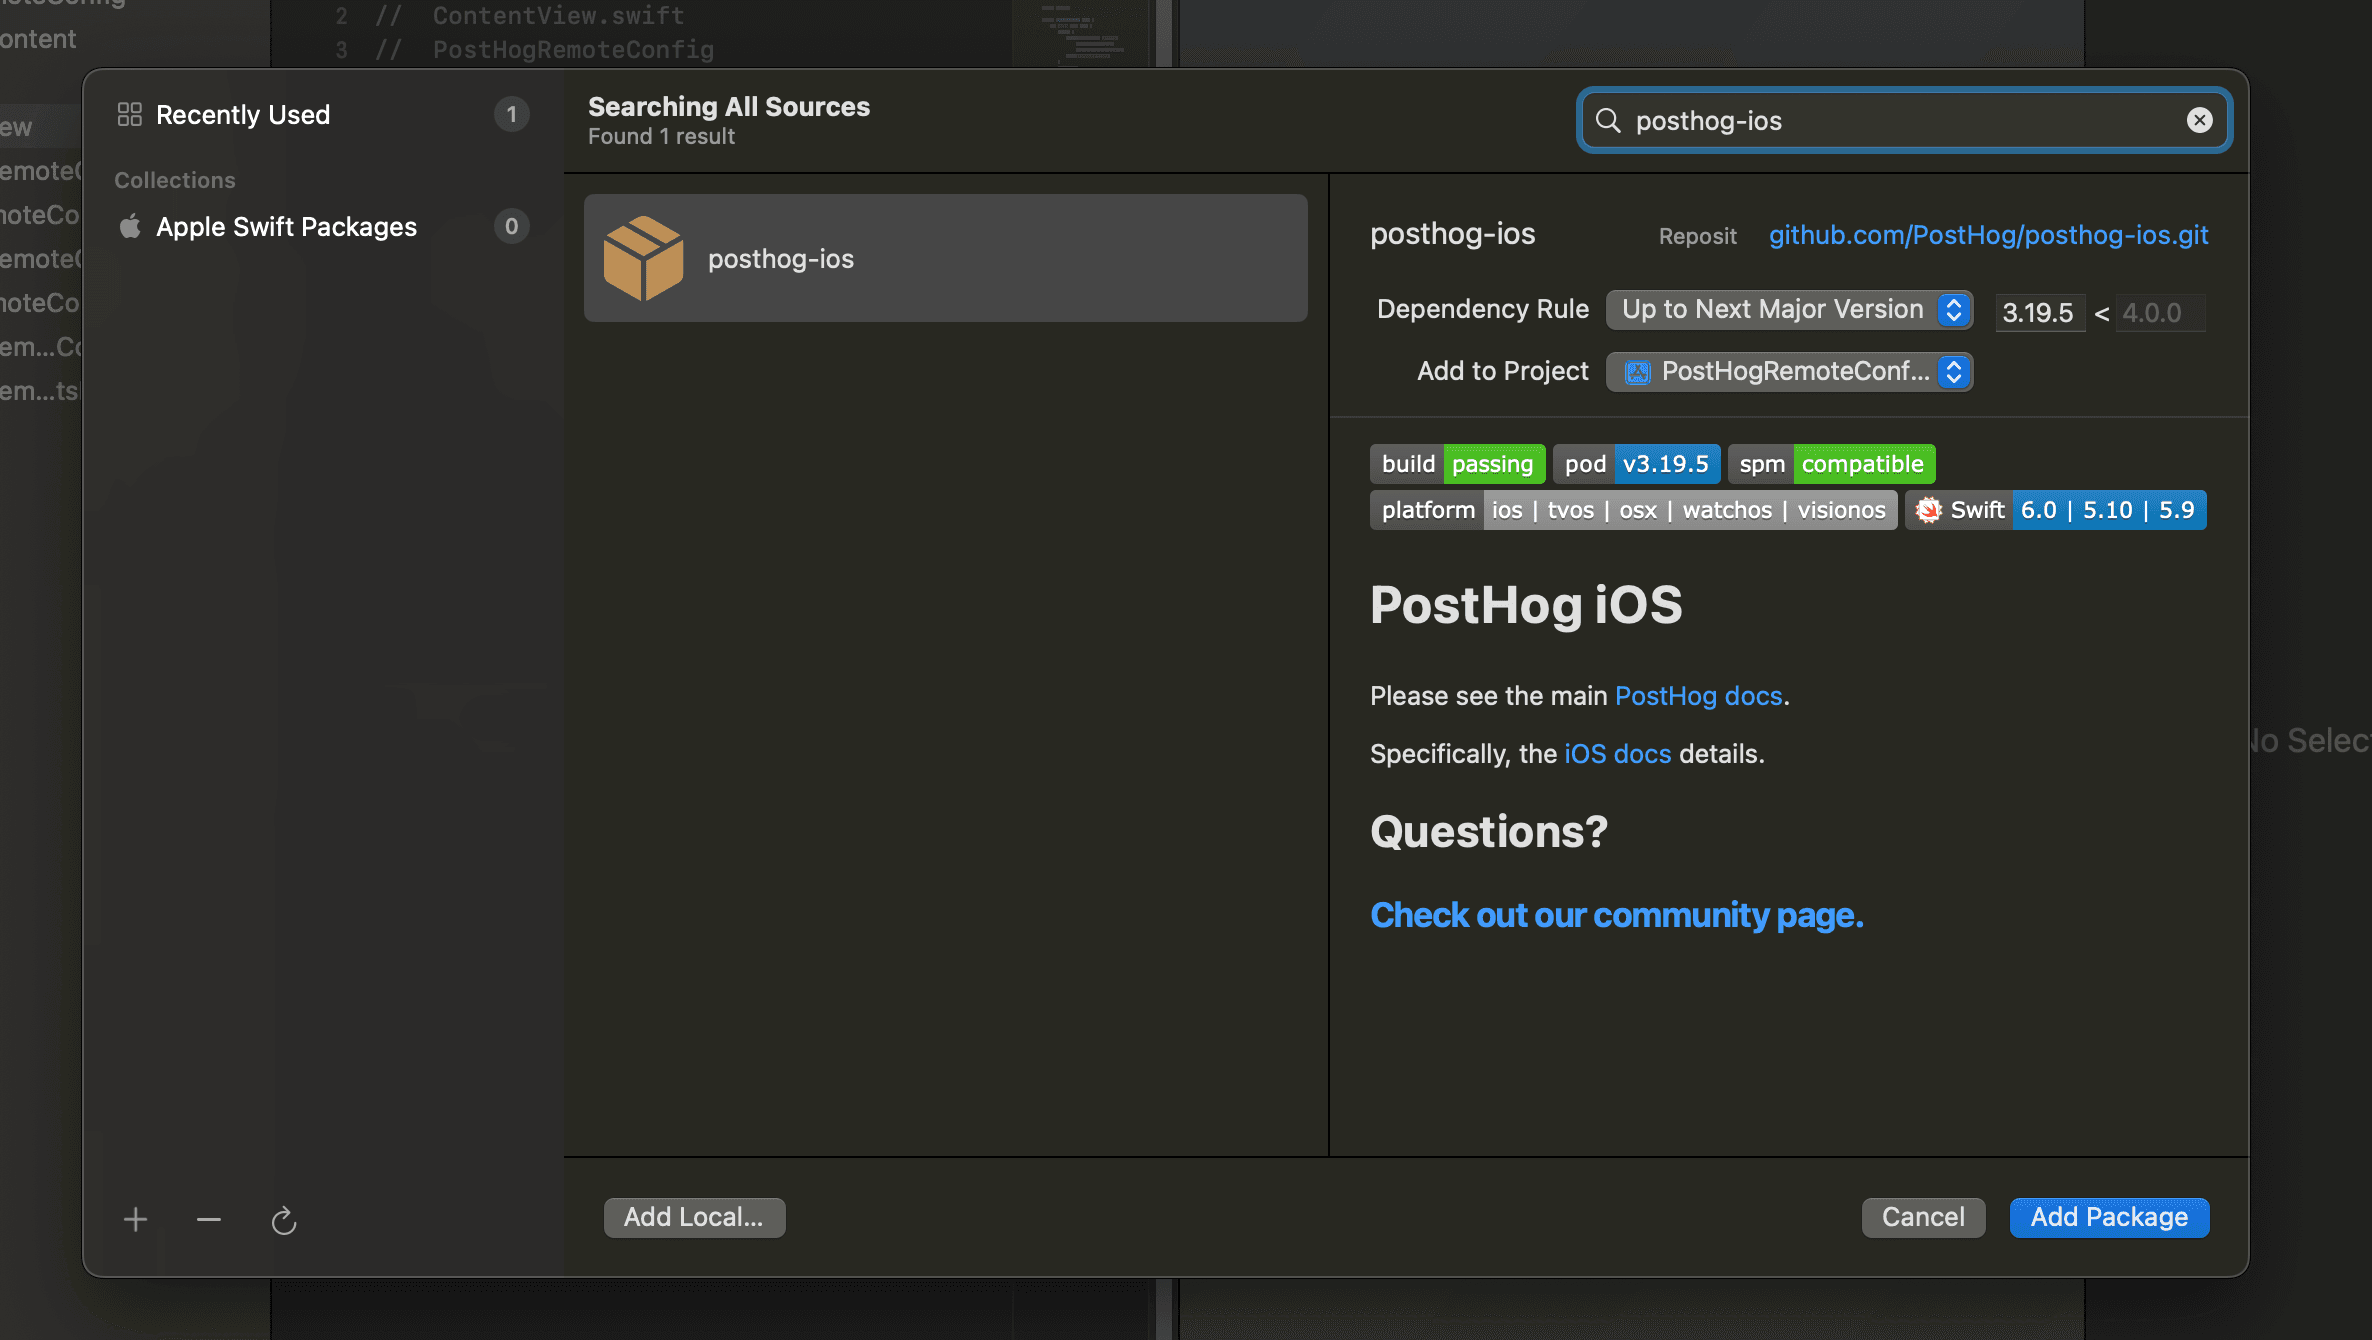
- In Xcode, select File > Add Package Dependencies
- Enter
https://github.com/PostHog/posthog-ios.gitin the search field - Click Add Package
Now, in PostHogRemoteConfigApp.swift, initialize PostHog with your project API key and host (both of which you can get in your project settings).
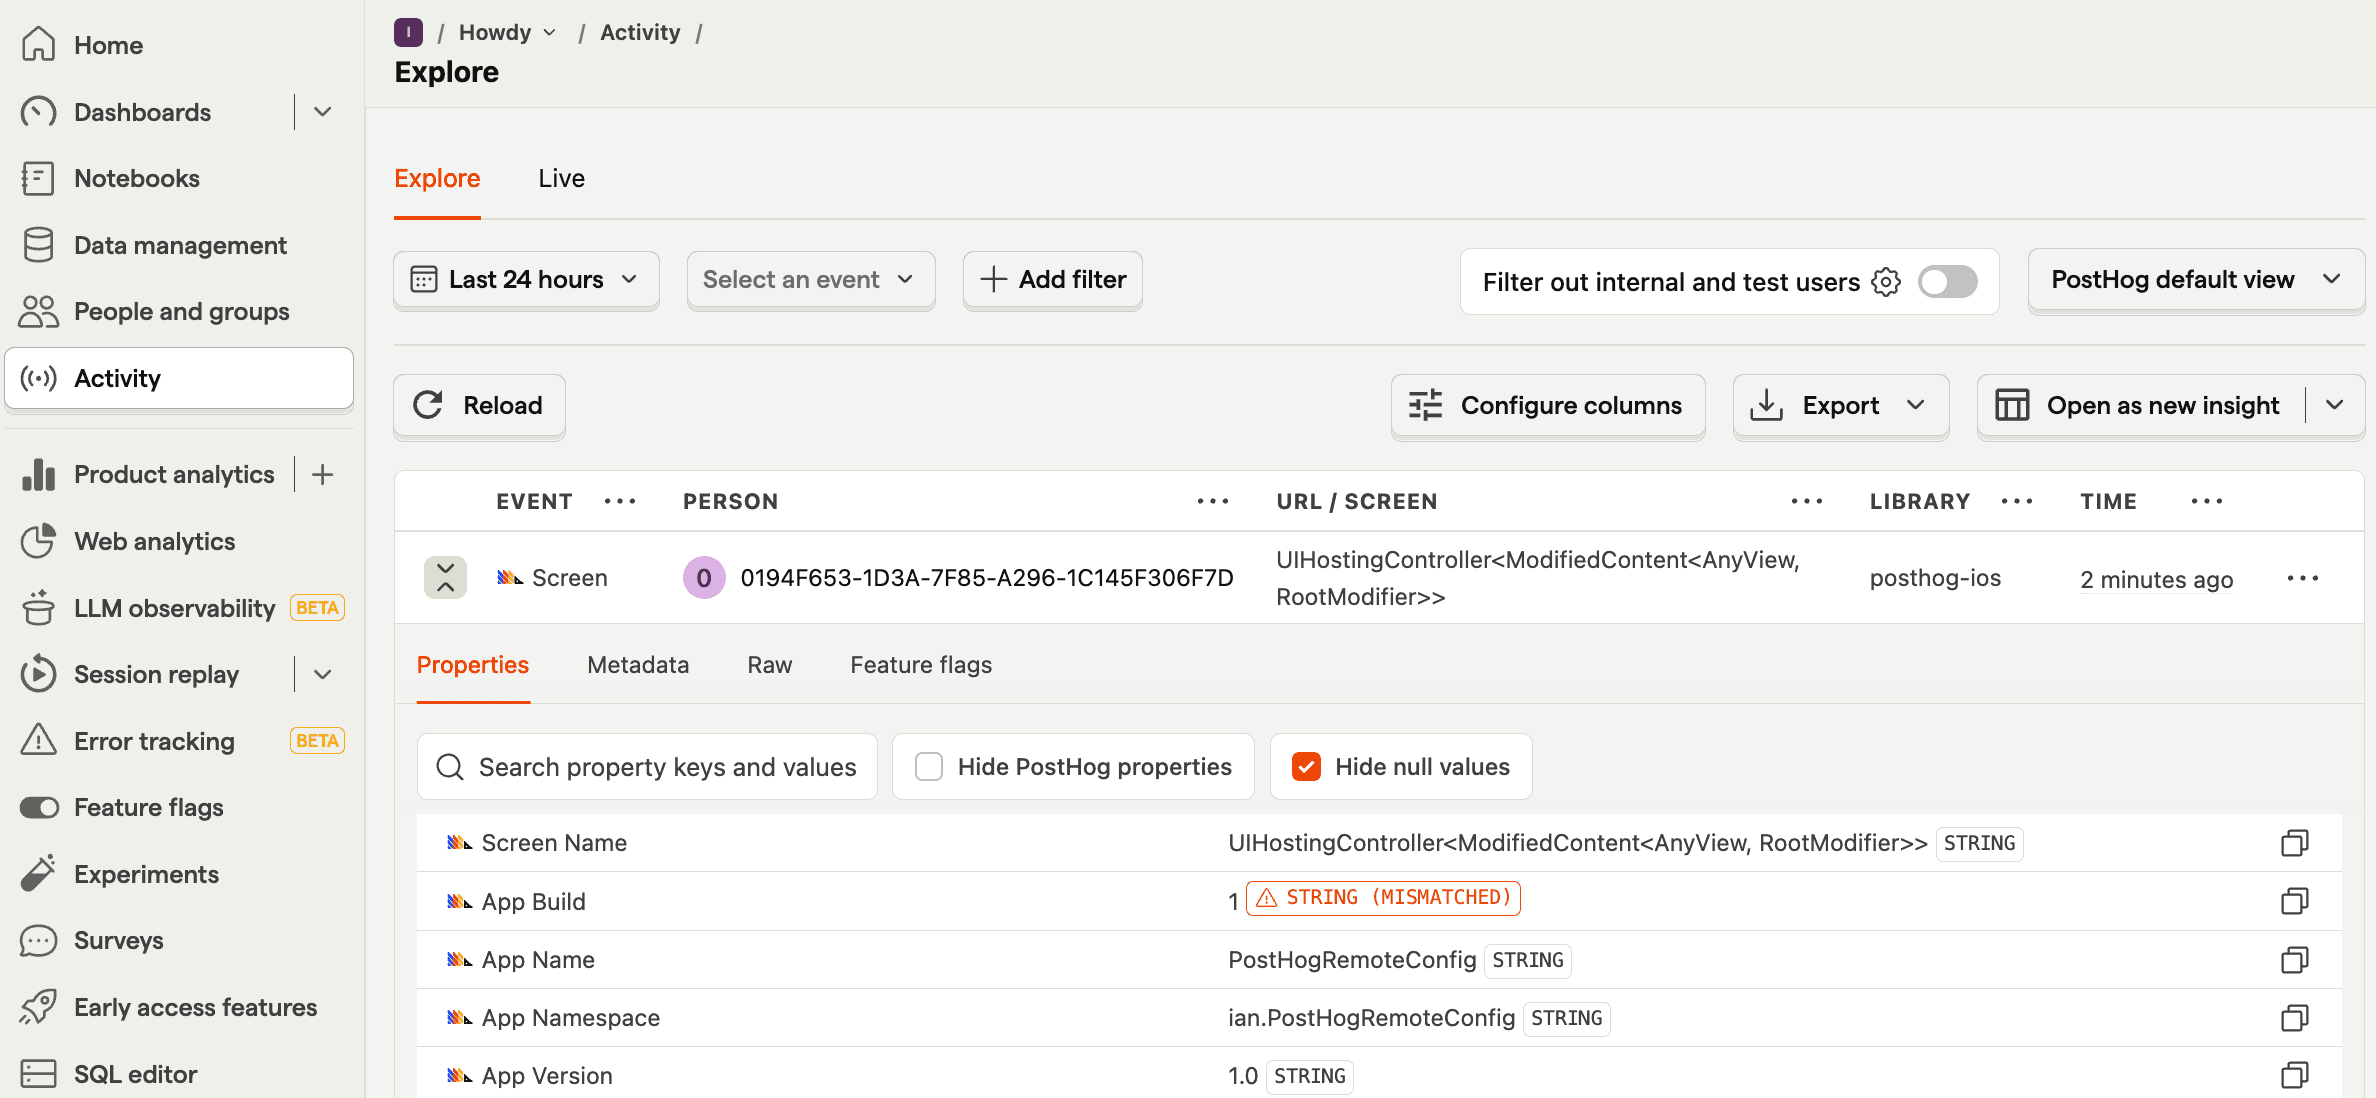
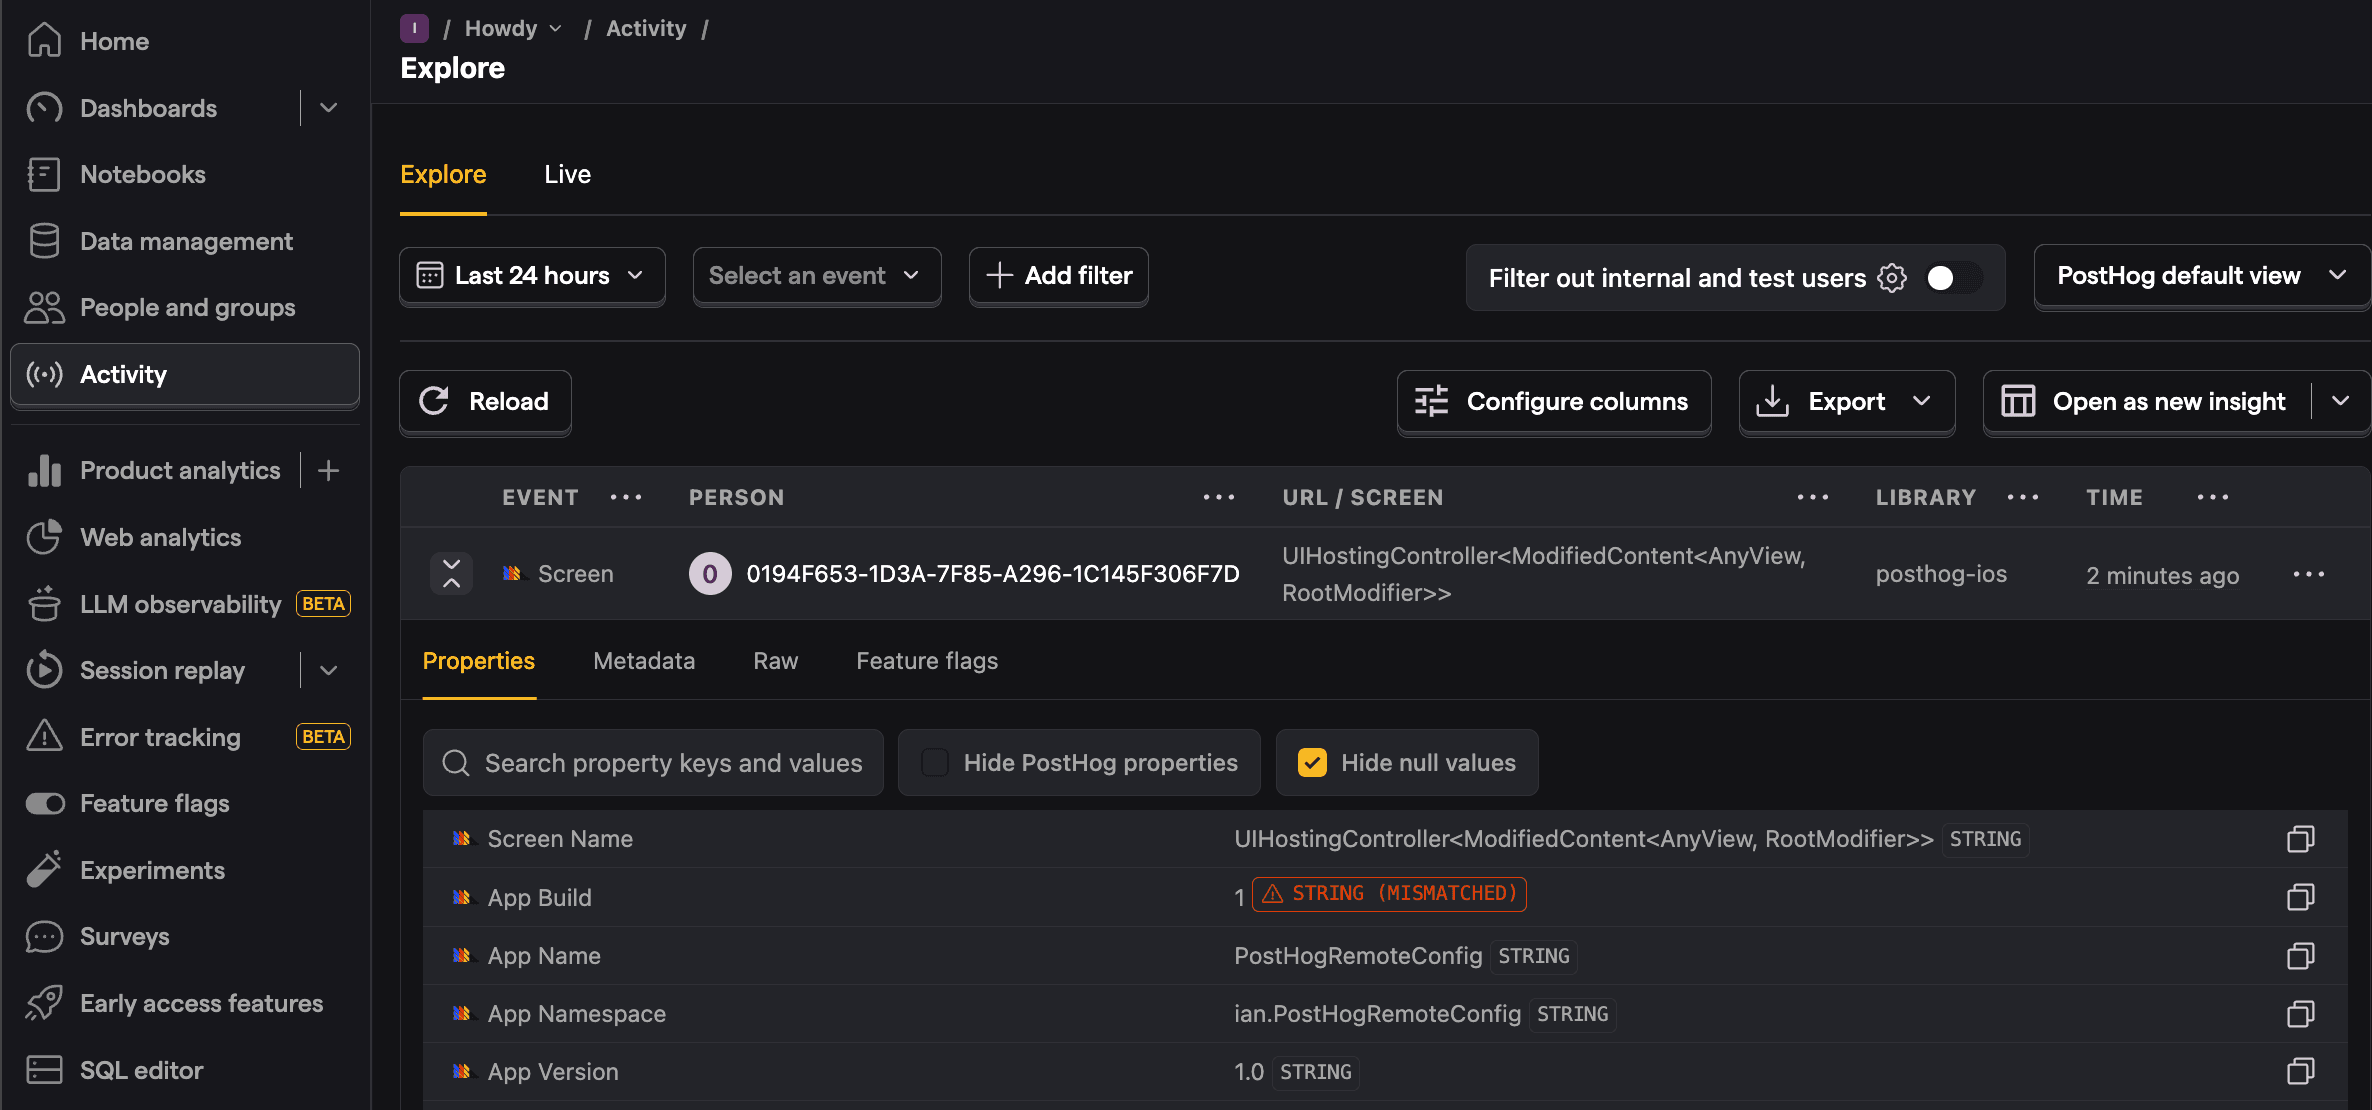
With this, you can build and run your app. Once launched, you should see events autocaptured into PostHog.
3. Creating our remote config
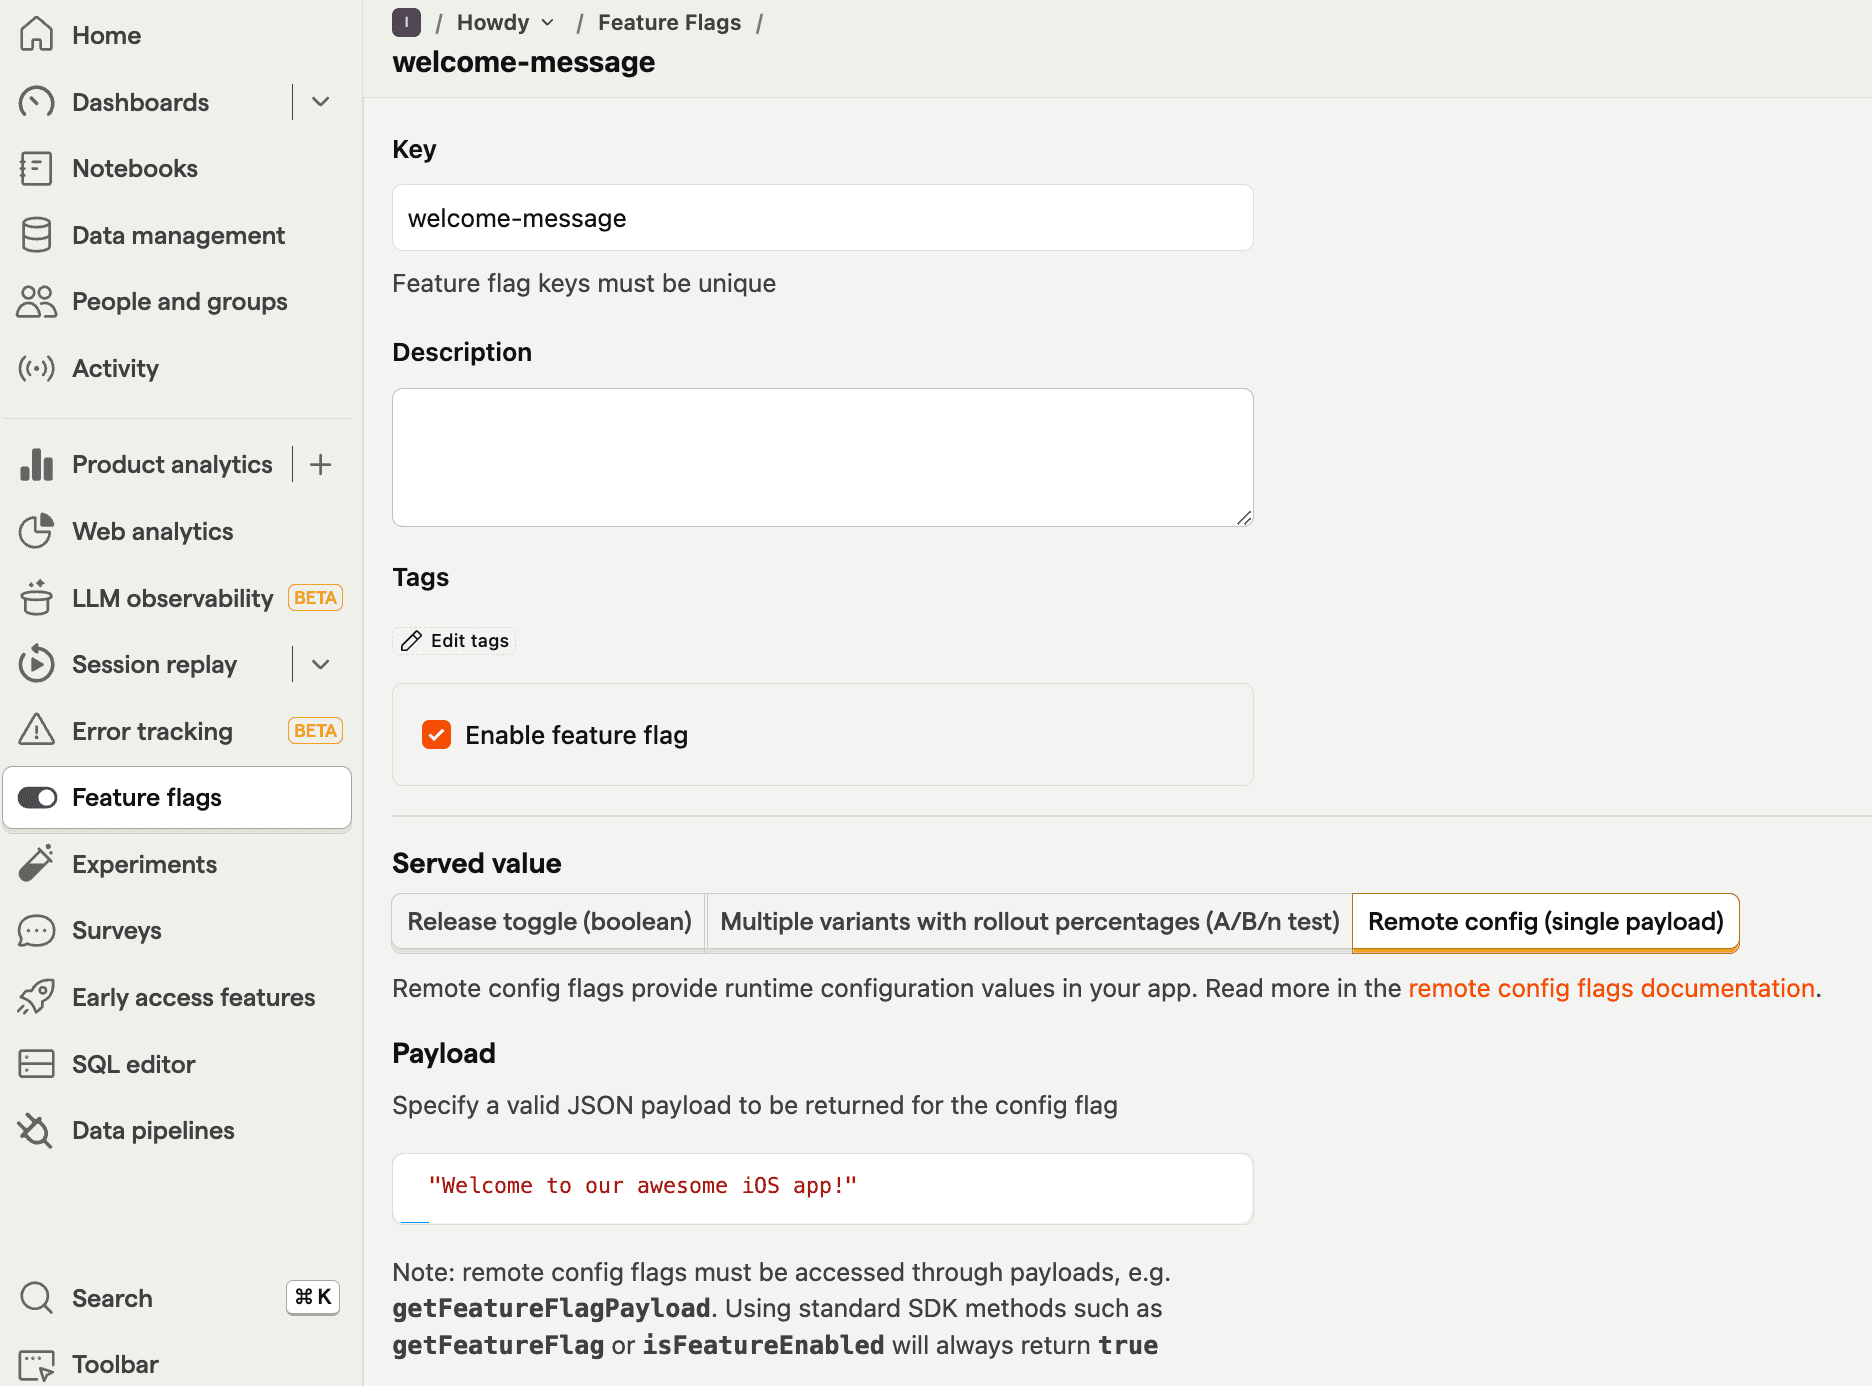
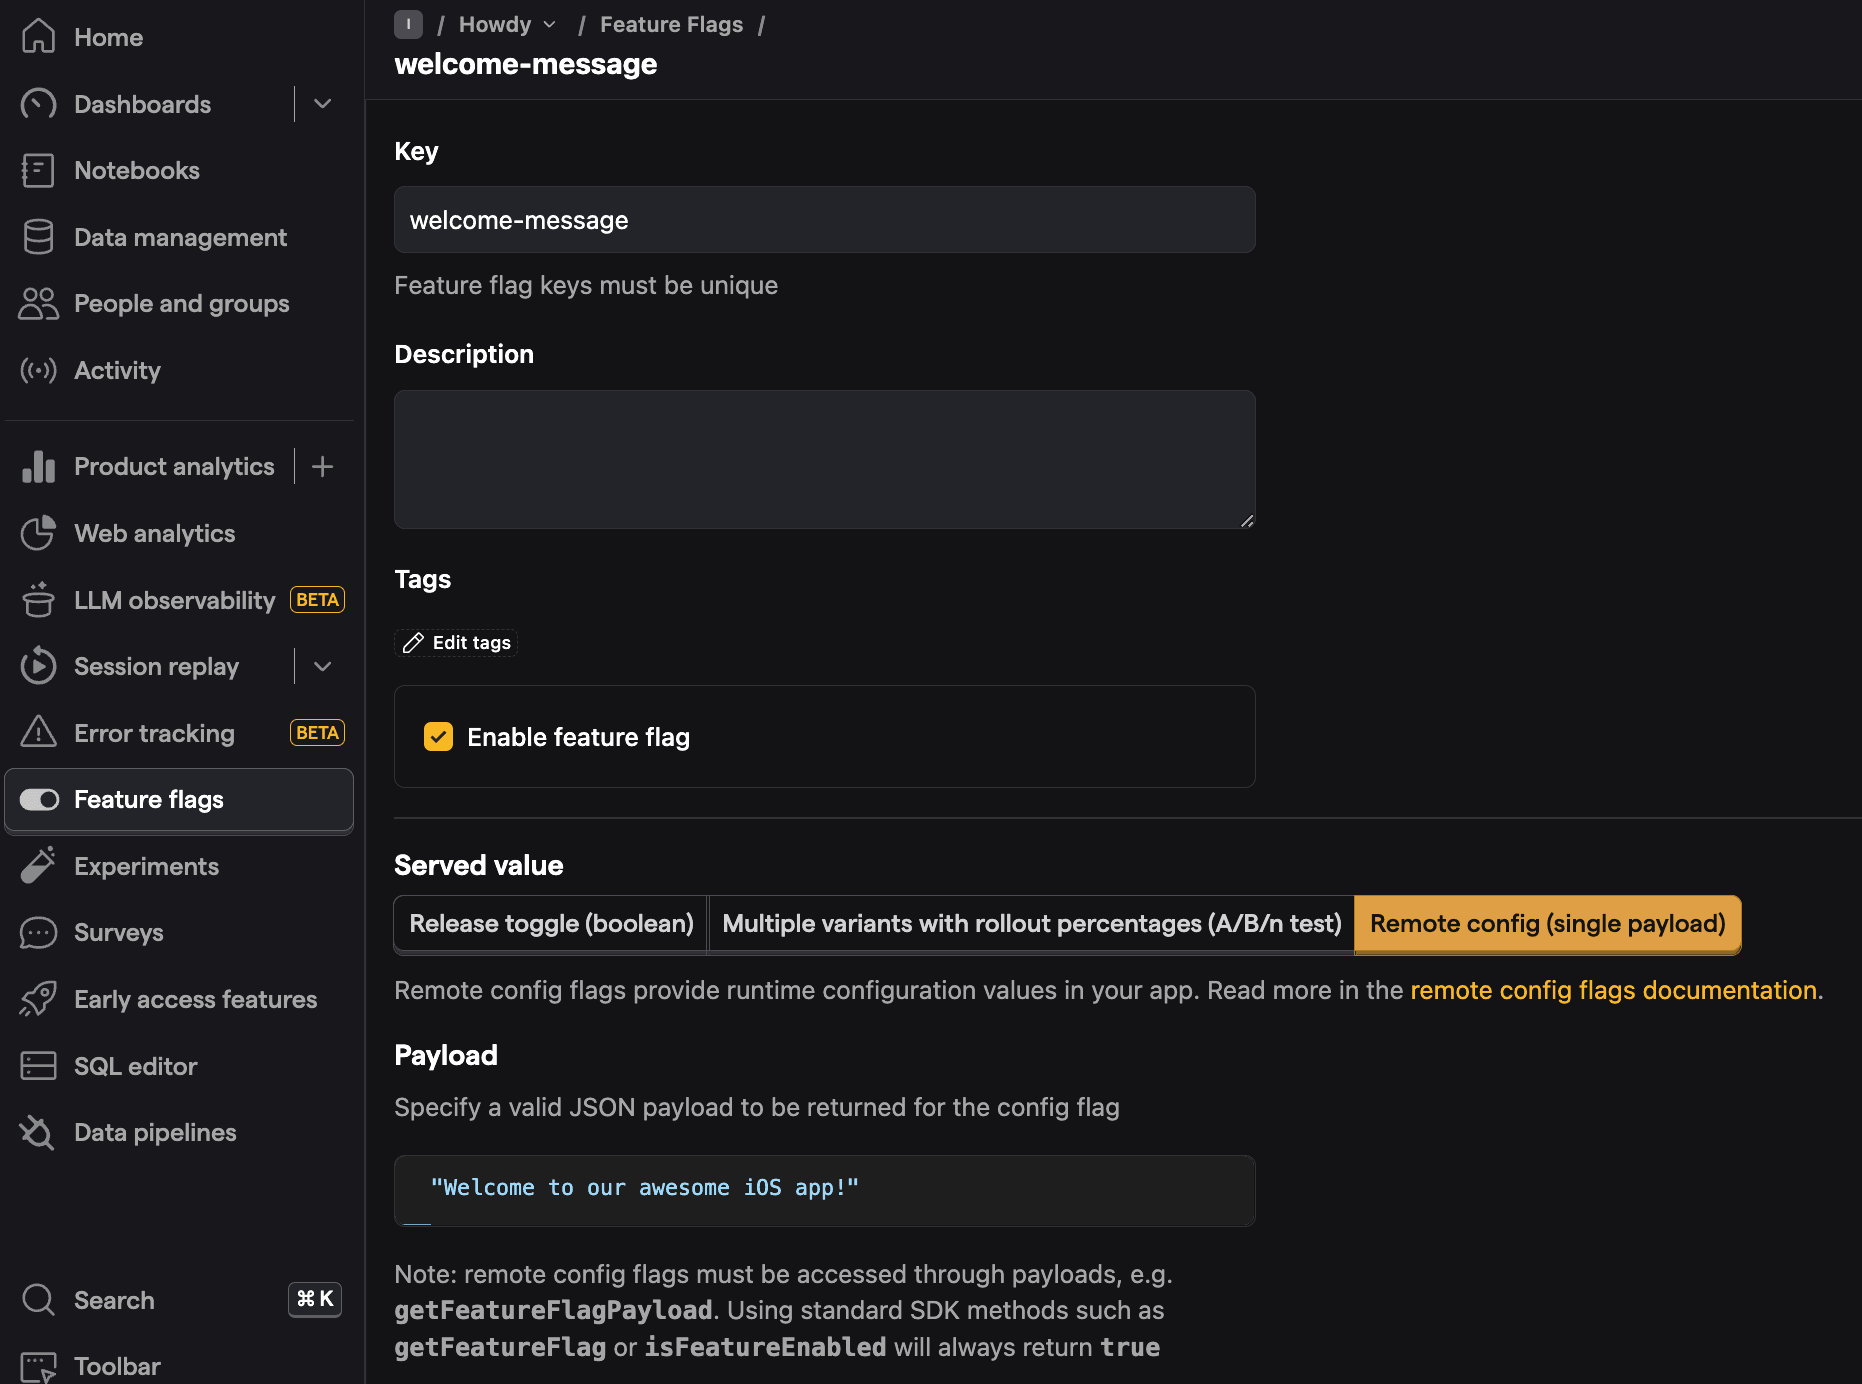
Now, let's set up the remote config flag in PostHog to control our welcome message:
- Go to the feature flags tab in PostHog
- Click New feature flag
- Set the key as
welcome-message - Under Served value, select Remote config (single payload)
- Set the payload to a string:
"Welcome to our awesome iOS app!" - Click Save
4. Setting up the app UI
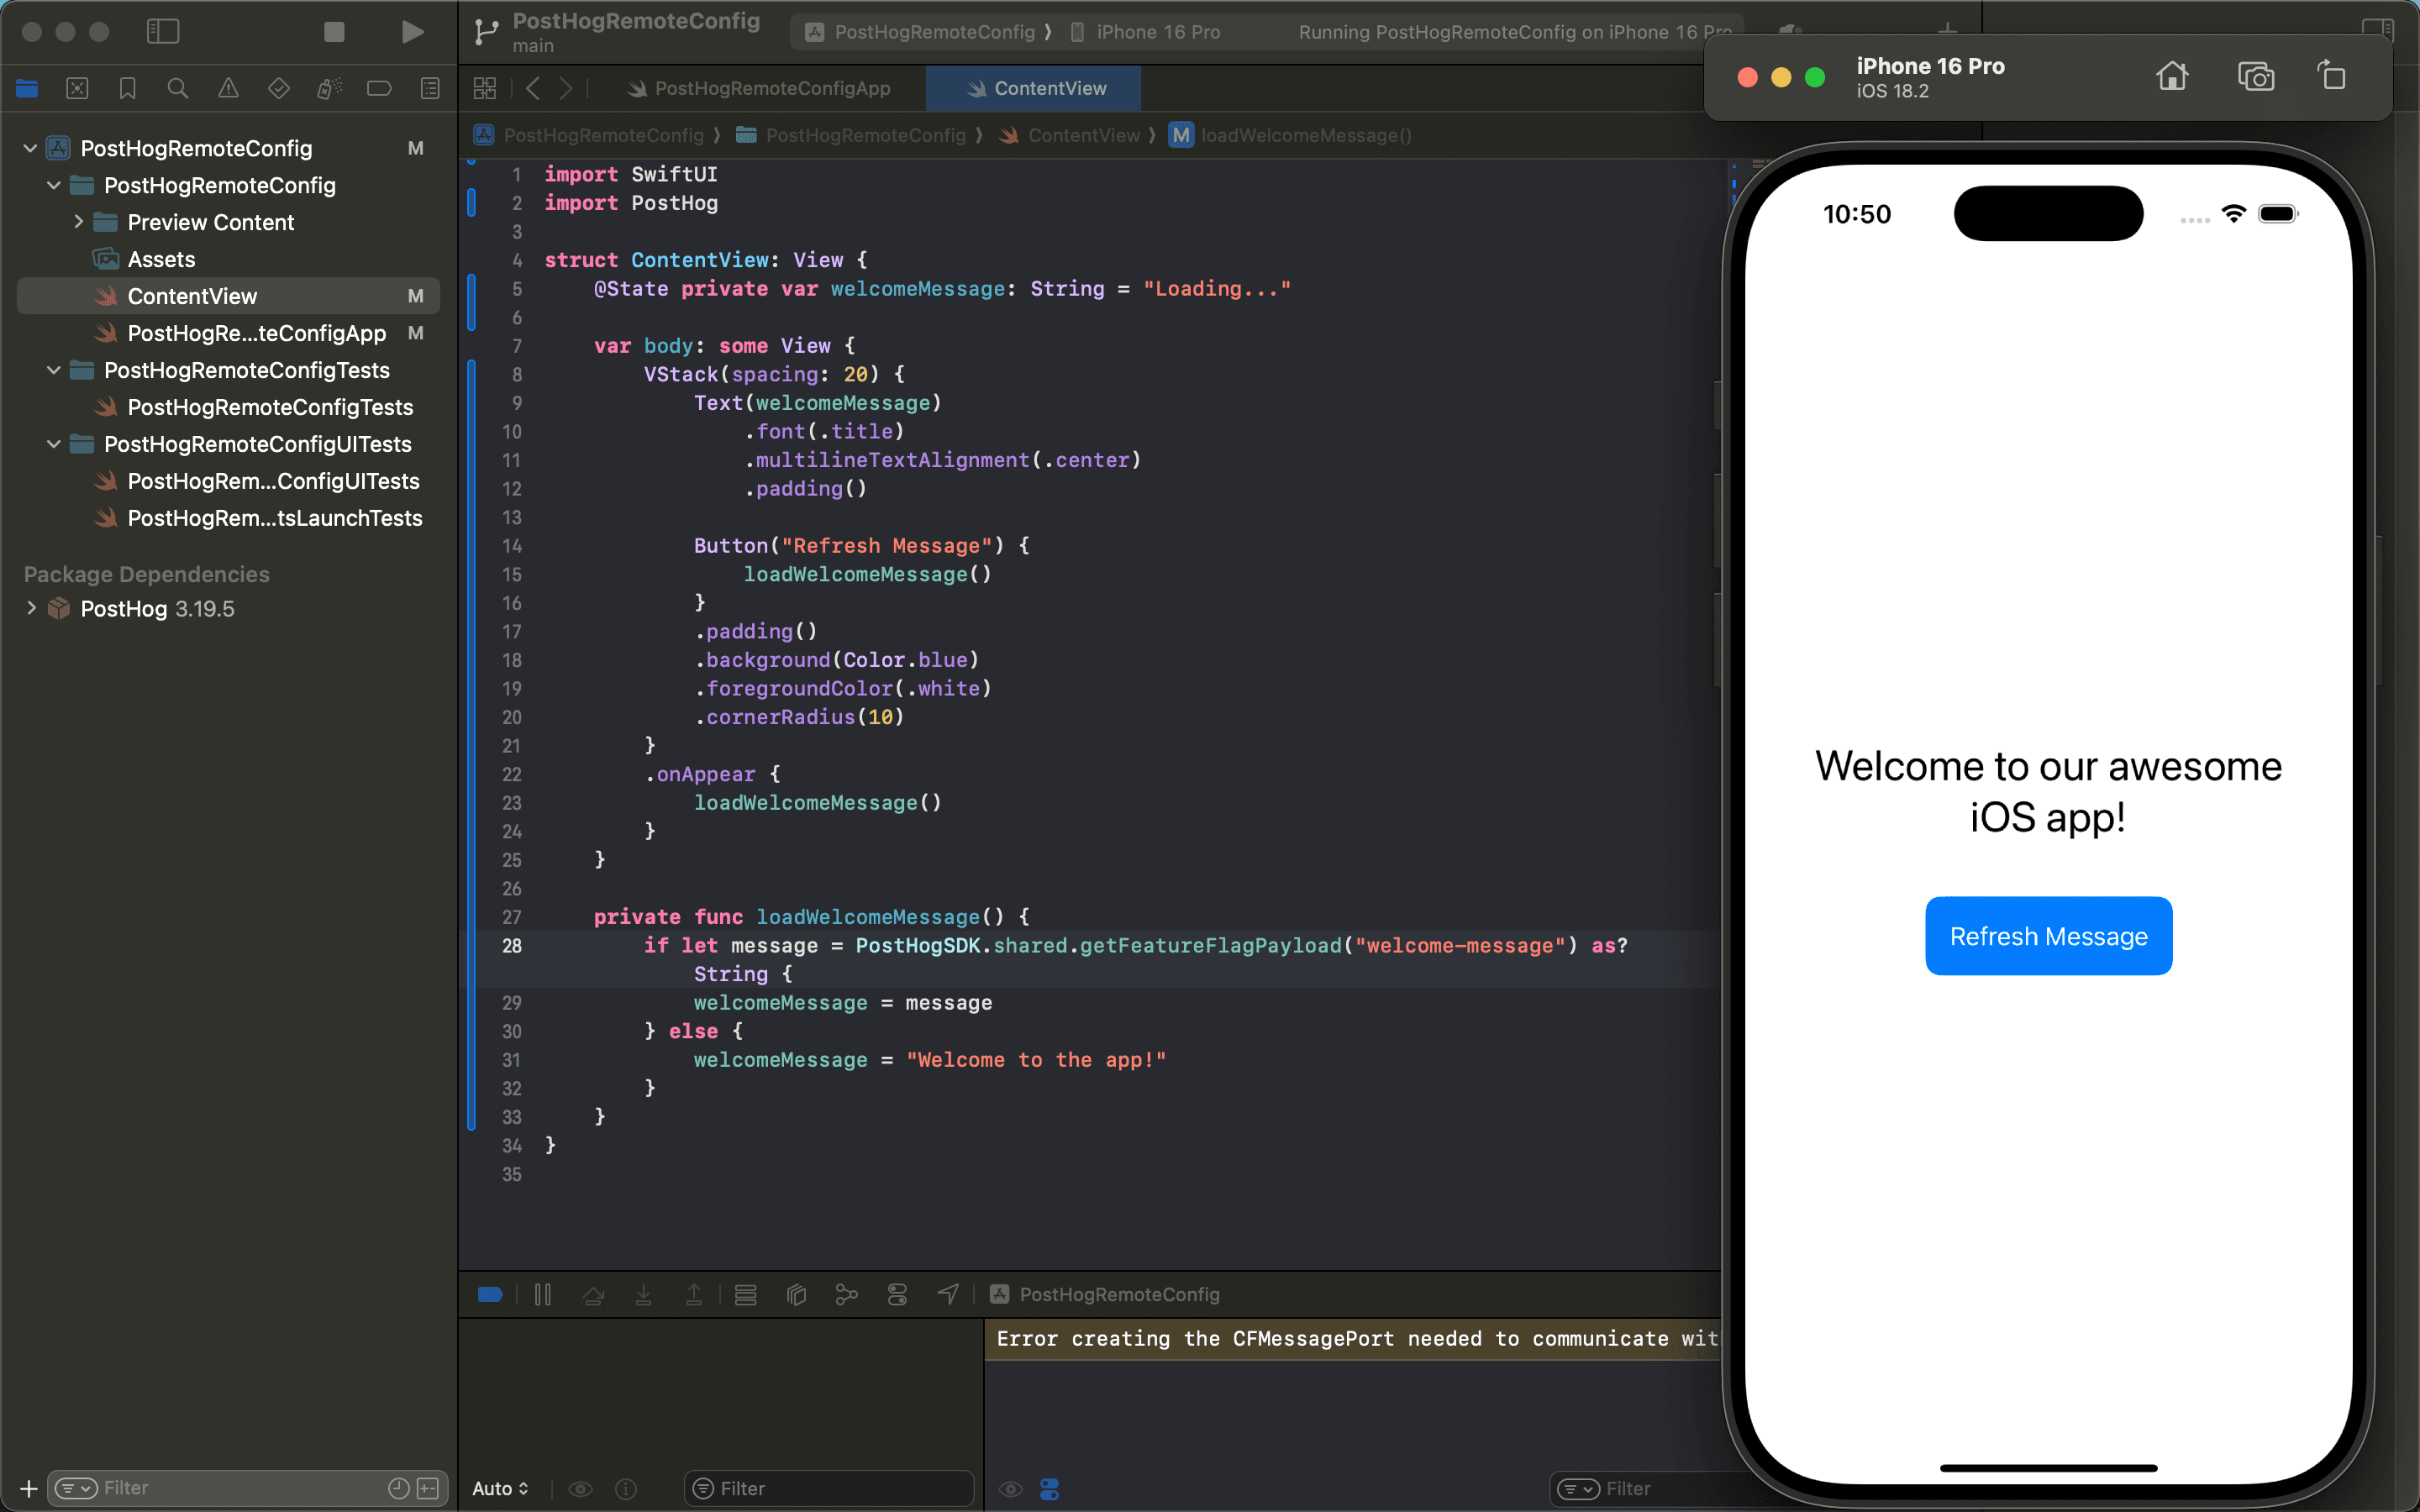
To show that message, let's create a simple UI in ContentView.swift that displays it. This requires:
- A basic view with a text element to display our message
- A
getFeatureFlagPayload()call to fetch our remote config value - A default message fall back if the remote config isn't available
- A refresh button to reload the message if we change the remote config
All together this looks like this:
To test this out, build and run your app again. You should see the welcome message from your remote config displayed in the center of the screen.
You can also go back into PostHog, update your remote config, and then press refresh in-app to see the updated message.
Further reading
- How to set up analytics in iOS
- How to run A/B tests in iOS
- Feature flags vs configuration: Which should you choose?
Questions? Ask Max AI.
It's easier than reading through 591 docs articles.